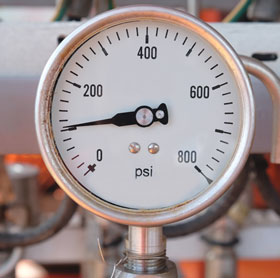

Pressure and temperature gauges are often the most used instruments in a plant. Gauges are relatively inexpensive and because of their large quantity, gauge maintenance is often neglected, resulting in unreliable and compromised instruments. Some plants choose not to replace failed gauges until they must, and sometimes that is too late.
A properly maintained, calibrated gauge will accurately indicate how the system is performing. Part of that function is to enable early detection of potential plant failures or accidents. Poorly maintained, inaccurate gauges can compromise a plant’s ability to detect potential problems. Accidents, damage and injury to equipment and personnel is often the result.
Incorrect selection, installation and neglecting to maintain pressure gauges can result in unplanned production downtime, process issues and inferior product quality. In addition, allowing instruments that are critical to the process to drift out of specification could potentially result in a risk to employee safety. The cost of calibration is normally insignificant compared to the potential lost production or injury costs. Ultimately, one needs to be able to trust the reading one gets from the pressure or temperature gauge.
To prevent gauge failure, SA Gauge recommends the following guidelines on selection and calibration be followed
Working pressure: although pressure gauges will tolerate full scale pressure for short periods, in general, the working pressure should not exceed 70% of the full-scale value. For thermometers, media pressure should not exceed 2500 kPa without the use of a suitable thermowell.
Wetted parts: these must be compatible with the process media. Choose from Cu-alloy (brass) or stainless steel 316. For media that will corrode the wetted parts or obstruct the pressure port, a diaphragm-type chemical seal should be selected.
Process/media temperature: maximum permitted process temperature for pressure gauges with brass wetted parts is 70°C. For stainless steel wetted parts, maximum process temperature should not exceed 100°C. Ambient temperatures are permitted from -20 to 60°C. Errors in accuracy need to be considered when using gauges above or below calibration conditions – usually 22°C. For applications where process temperatures exceed permissible levels, the media needs to be cooled down before entering the instrument. SA Gauge accessories like cooling towers, siphon tubes, capillary assemblies and diaphragm seals are typical devices used to separate and protect the instrument from the process heat source.
Corrosive and solidifying media: some aggressive or corroding process media will attack copper-alloy or stainless steel 316, or will solidify and obstruct the pressure port of the gauge. SA Gauge’s diaphragm seals are designed to isolate the pressure gauge from the media to ensure accurate and reliable pressure readings. The wetted parts of the diaphragm seal are made from process appropriate materials such as stainless Hastelloy, tantalum or PTFE.
Vibration: due to the mechanical nature of pressure gauges, vibration is one of the main reasons for premature failure. Linkages, gears and bushings are all parts suffering from excessive wear when exposed to vibration. Pointer oscillation makes accurate reading difficult, but can be avoided by filling the gauge with glycerine or silicone oil. Liquid filling of gauges lubricates all the friction points, ensuring longer instrument life.
Pulsation: dynamic load cycles of pumps and valves that cause a rapid change in pressure in a system causes metal fatigue in the elastic bourbon sensing element, resulting in gauge failure. Whilst glycerine filling of the gauge will assist against pointer flutter, it cannot prevent the damage caused by pulsation to the bourdon tube. A flow restricting device is the best option here. SA Gauge’s pulsation dampers such as inlet-restricting or piston-type snubbers restrict the pressure pulsation.
Over pressure: this typically occurs when a pressure gauge is subjected to a sudden rush of process pressure, such as when full bore valves are quickly opened under load. This short ‘spike’ in the system subjects the gauge to more pressure than it is designed for, resulting in permanent damage. To prevent this, SA Gauge manufactures an overpressure protector that can be adjusted and locked to shut the process pressure off at a given set value. The protector automatically opens again once the over pressure condition has passed.
Installation: always secure the instrument by means of a suitable wrench on the hexagon/square of the threaded connection. Twisting the instrument by hand on the case can cause damage to the internals of the instrument. For gauges with flanges, support the gauge fitting with a suitably sized wrench to counter the force of tightening the process fitting. This will prevent damaging the gauge internals.
Calibration: even the highest quality instruments are subject to drift over time, resulting in inaccurate measurements and substandard performance. It is important that all instruments are calibrated by approved personnel. Calibration intervals and error limits should be defined, and records of the calibration results should be kept, maintaining instrument integrity. SA Gauge’s calibration laboratories are SANAS ISO/IEC 17025 accredited and maintain the highest accuracies to ensure international traceability.
| Tel: | +27 31 579 2216 |
| Email: | [email protected] |
| www: | www.sagauge.com |
| Articles: | More information and articles about SA Gauge |

© Technews Publishing (Pty) Ltd | All Rights Reserved