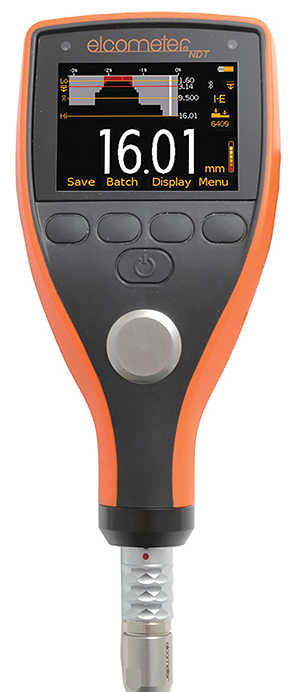
Mining equipment is under constant operational stress due to the harsh working environments present in mines and quarries, and the weight of the materials involved. This can cause wear and corrosion which can become dangerous, resulting in loss of productivity and even injury or potential death of operators.
The mining industry also has to adhere to various industry standards and regulations, which requires regular testing of equipment. In order to accomplish the necessary testing with minimal downtime and without causing any damage to the area under test, ultrasonic NDT (non-destructive testing) is carried out.

Capable of non-destructively measuring a wide variety of materials – including metals, rubber and plastics – ultrasonic thickness gauges are ideal for monitoring corrosion and erosion, or checking for defects in complex manufactured components. Testing mining equipment using ultrasonic thickness gauges allows operators to quickly and easily determine whether the equipment is fit for purpose or what action needs to be taken if corrosion has occurred.
The Elcometer MTG range of ultrasonic material thickness gauges can measure both uncoated materials up to 500 mm thick, and coated materials up to 25 mm thick, regardless of the coating, using a dual-element transducer.
Dual-element transducers consist of two independent crystals separated by an acoustic barrier. The two elements are angled so that when one crystal emits an ultrasonic pulse, the energy path creates a ‘V’ shape, entering the material via ultrasonic couplant, hitting the back wall of the material, and echoing towards the other crystal where the pulse is detected. The gauge then uses the speed of the pulse and the time taken to travel from one crystal to another (from pulse to echo), to calculate the thickness of the material – with the acoustic barrier preventing any sound from reaching the receiver directly from the emitter before the pulse has completed its path.
Choosing a material thickness gauge
Ultrasonic thickness gauges come in many forms, each with different features. In the Elcometer MTG range, the MTG2 is simple and low cost, ideal for taking thickness measurements on steel and capable of taking four readings per second. The MTG4 gauge also takes four readings per second, whereas the MTG6 and MTG8 gauges are faster and are able to take four, eight or 16 readings per second while displaying the thickness value.
The MTG6 and MTG8 feature a high-speed scan feature which allows the user to ‘scrub’ the probe over the surface, continuously displaying the thickness values at a rate of 16 readings per second. When the probe is removed from the surface, the thinnest thickness value that was measured is displayed, showing the most likely point for potential failure.
The top-of-the-range gauge in the family, the MTG8 features a differential mode and a limits mode. In differential mode, a target thickness can be entered into the gauge so that, when measuring, the gauge will display the variance from that value. Similarly, the limits mode also allows a target value to be entered into the gauge. If a reading is taken below this value, an alarm will sound and the red LED on the keyboard will light.
Data logging
The MTG6 and MTG8 gauges both have data logging capabilities, allowing readings to be saved in their memories and then downloaded via USB or Bluetooth to PC, iOS or Android devices for further analysis and reporting. The MTG6 gauge can store up to 1500 readings whereas the MTG8 can store up to 100 000 readings in up to 1000 batches. A batch is a group of readings which can be saved sequentially or into a grid format, so for example the MTG8 can store multiple batches which can represent multiple locations around the asset being inspected.
To help undertake and report grid-based corrosion inspections quickly and easily, the Elcometer MTG8 comes with a grid batching feature which allows readings to be saved instantly into a grid, making it easy to complete and report on the inspection.
Using a grid is ideal when inspecting large areas as it clearly marks and identifies areas of concern, and helps to identify exactly where the corrosion is occurring. By repeating grid-based inspections in the same location over time, corrosion rates can be predicted and preventive maintenance can be performed to avoid a breakdown.
Inspection reporting
When it comes to inspection reporting, a report would typically be created manually, either by hand or using word processing or spreadsheet software, which can be both time consuming and prone to human error. By contrast, when the MTG6 or MTG8 are connected via USB or Bluetooth to ElcoMaster (Elcometer’s free software application) readings can be transferred, with full statistics, calibration information and limits, to a smartphone, tablet or PC. Once the data and any additional notes and photographs have been uploaded, the software is able to instantly create a professional inspection report that can be exported to PDF, printed or sent elsewhere via email.
ElcoMaster software can also be used during the inspection process. The software’s ‘Collects’ feature allows the inspector to follow a template live from an Android or Apple mobile device, showing exactly where to inspect. To do this, a picture of the inspection area should be uploaded to the ElcoMaster mobile app and specific locations that need to be inspected must be added. Once the area is inspected, the app will instantly display an image showing exactly where the corrosion is occurring, which can be used in the final inspection report.
| Tel: | +27 21 683 2100 |
| Email: | [email protected] |
| www: | www.bamr.co.za |
| Articles: | More information and articles about BAMR |

© Technews Publishing (Pty) Ltd | All Rights Reserved