
What is calibration?
Basic pressure gauge calibration is the comparison of measurement values of a unit under test (your gauge) with those of a more accurate calibrated reference instrument. This instrument is normally traceable to National Standards (NMISA).
The term calibration means just the act of the comparison and the recording of noted values on a certificate. It does not normally include corrective adjustment. The outcome of the comparison can result in the following three reports:
• No significant error being noted.
• A significant error being noted but no adjustment made.
• An adjustment made to correct the error to an acceptable level. (When adjustments are made, the before and after values should be indicated.)
The purpose of calibration is to maintain the quality and accuracy of measurement and to ensure the proper working of a particular instrument.
The importance of calibration
Even the highest quality instruments are subject to drift over time, resulting in inaccurate measurements and substandard performance. It is very important that all instruments are calibrated by trained, competent and approved personnel. Calibration intervals and error limits should be defined and records of the calibration results should be kept, maintaining instrument integrity.
Neglecting calibration can result in unplanned production downtime, inferior products, or process quality issues. In addition, allowing instruments that are critical to the process to drift out of specification could potentially result in a risk to employee safety. The cost of calibration is normally insignificant compared to the potential production or injury costs.
When to calibrate
Calibration intervals as specified by the manufacturer are normally followed until the user can assign calibration intervals based on the history of previous calibration results. In addition, calibration is often required with a new instrument, or when an instrument may have been subjected to an unexpected shock or vibration that may have put it out of its specified limits.
Types of pressure gauges
Different types of pressure measurement exist. These include gauge pressure, vacuum, absolute, barometric, and differential pressure.
Gauges are available for each of the above types of pressures, as well as for compound pressure which indicates pressure or vacuum on the same dial. For the calibration information below, we will use gauge pressure, the most common type.
The most common calibration guidelines
There are many factors influencing calibration. Listed below are a few of the most common that may influence the calibration of gauges in the class 0,25%, 1% and 1,6%.
1. Accuracy class
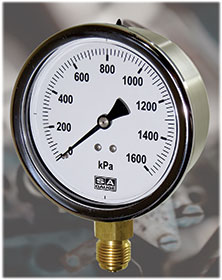
Pressure gauges are manufactured in many different accuracy classes: most commonly as per EN 837 accuracy classes from 0,1% to 0,4% of range. The class indicates the allowable percentage error of the full-scale value of the gauge. For example, if the full-scale value is 1600 kPa and the gauge class is 1,6% then the maximum allowable error of the gauge will be 25,6 kPa, rounded up to 26 kPa. (Error values should always be rounded up, never round down.)
When calibrating, all values reported should be within the class of the gauge. If the class is unknown, the manufacturer should be contacted. For process applications, the following accuracies normally apply: for dial sizes 40 mm and 50 mm, class 2,5%; for 63 mm class 1,6%; and for 100 mm and 160 mm class 1%. For reference test gauges with mirror scales, the norm is 0,25% accuracy. Remember that these values are the percentage value of the full scale, not the percentage value of readings taken anywhere else on the dial.
2. Pressure media and Adiabatic effect
Lower pressure gauges are normally calibrated with air and higher pressure gauges are calibrated with liquid. For pressures below 40 kPa, gas such as nitrogen or alternatively regular air are the preferred media.
Gas is also practical for use for pressures up to 6000 kPa as long as the Adiabatic cooling effect is eliminated. The Adiabatic cooling effect occurs when gas is rapidly pressurised in a closed system. The gas heats up and expands in volume, resulting in a higher pressure reading than after it has been allowed to cool down and stabilise. Readings should only be taken after allowing the gas to cool down and the system to stabilise.
For pressures above 60 kPa water or oil may be used as a pressure media.
3. Pressurising the gauge
The most common pressure gauges consist of a mechanical element, linked to a mechanical movement with screws or rivets. Pressurise and vent the gauge three times before calibration to ensure repeatable values can be obtained. Each time check for drag or pointer stickiness.
4. Reading the pressure
Different dial sizes and different scale ranges result in varying degrees of difficulty when taking pressure readings. All dials have major and minor scale markings and the distance between the resolution marks is determined by the gauge dial size, the range of the gauge and the class of the gauge. (As a rule of thumb, most resolutions can be divided by four if necessary to take a more accurate reading.)

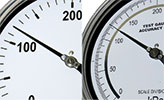
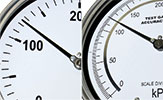
Standard practice is to apply pressure to the gauge under test until the pointer lines up perfectly on a graduation, and then take the reading on the more accurate reference instrument that should have a better resolution. It is also important to avoid parallax errors when taking readings. Because the pointer is not against the dial plate, looking at an angle at the gauge will result in incorrect readings. Most test gauges have a mirror dial to assist the operator to line up the reflection of the pointer with the actual pointer, making sure that the reading is taken from a perfectly perpendicular angle.

5. Hysteresis
Hysteresis exists in all mechanical pressure gauges and, if required, it must be recorded on the certificate. Hysteresis is the difference in value at the same calibration point but in opposing directions. Take a reading at a point when the pressure rises and again at the same point with the pressure falling. The difference in value will be the hysteresis. Gentle tapping on the gauge to release any friction is considered standard practice and is recommended.
Note: There are more factors to consider when calibrating pressure gauges and the above information addresses only some of the main points.
For more information contact Chris du Plessis, SA Gauge, +27 (0)86 000 7911, [email protected], www.sagauge.com
| Tel: | +27 31 579 2216 |
| Email: | [email protected] |
| www: | www.sagauge.com |
| Articles: | More information and articles about SA Gauge |

© Technews Publishing (Pty) Ltd | All Rights Reserved