
Process Calibration Tools (PCT) is a family of Fluke tools that enable users to calibrate temperature, pressure, flow and electrical sensors, transmitters and gauges in-situ and in workshops.
Pressure
A complete pressure calibration system includes components to generate, control and measure pressure – and normally to log data from some or all of these functions. Some systems include two or all of these functions in a single unit. A procedure to adjust the unit is also usually required.
Pressure monitors and references are digital readouts or gauges that convert the pressure into numerical pressure units. Pressure sources generate either pneumatic (gas) or hydraulic (oil, water or alcohol typically) pressure. For PCT field applications, a hand-pump or comparison test pump can be used, in conjunction with a reference calibrator; these normally provide sufficient control for field applications. On the bench, for higher pressures and where a greater degree of control or automation is required, a gas bottle or shop air can be used with a controller.
Deadweight testers and the related electronic deadweight tester are portable systems that provide all three functions – generation, control and measurement – in a single unit, and are suitable for both field and bench use.
Applications
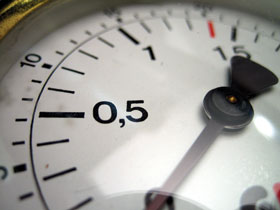
Analogue and digital pressure gauges are often used to monitor pressures in processes. Gauges have an internal mechanical or electro-mechanical mechanism to convert input pressure to a reading.
Sensors and transmitters comprise both a sensor assembly, to detect and measure the pressure, and a transmitter, which converts the pressure into an electrical signal, typically 4-20 mA, which can be transmitted to a control panel, PLC or other readout. In this case, there are two items to be calibrated.
The first and most important step is to calibrate the pressure-to-resistance (or pressure-to-voltage) relationship of the sensor, and the second step is to calibrate and verify the linearity and offset of the conversion of electrical signal from the sensor into a 4-20 milliamp signal. Calibrating the sensor requires a pressure source such as a handheld pump and a reference calibrator such as a Fluke 700G if the sensor can be removed from the circuit or a reference calibrator placed in circuit adjacent to the sensor. Calibrating the transmitter requires a multi-function calibrator or documenting process calibrator.
If the sensor or transmitter is found to be out of tolerance, the span and offset have to be adjusted on the transmitter. If the transmitter uses a digital communication protocol the span and offset is adjusted through a digital communicator or with a documenting process calibrator capable of digital communication. Otherwise, trim pots on the transmitter are used to adjust the span and offset.
Why calibrate?
The need to achieve consistent results is one of the most important reasons to calibrate. Accuracy is an important feature of a calibrator. Users may need a particular level of accuracy to comply with standards that specify a test accuracy ratio (TAR) or test uncertainty ration (TUR). For example, many standards require a 4:1 ratio between the specified tolerance of the device under test (DUT) and the accuracy, or uncertainty, of the calibration equipment.
However, accuracy is also important because when accurate standards are used most of the time, downtime only needs to be long enough to verify that the instruments are still in tolerance. However, with inaccurate calibration standards, more borderline and out-of-tolerance indications are found. This means that a routine verification turns into an additional adjustment procedure and a final verification at each of the test points to prove the ‘as left’ condition is in tolerance. This more than doubles the downtime and the technician time involved in completing the calibration. This is because inaccurate standards tend to not be consistent with each other causing us to make more adjustments to correct phantom errors.
For more information contact Val Verwer, Comtest, +27 (0)11 608 8520, [email protected], www.comtest.co.za
| Tel: | +27 10 595 1824 |
| Email: | [email protected] |
| www: | www.comtest.co.za |
| Articles: | More information and articles about Comtest |

© Technews Publishing (Pty) Ltd | All Rights Reserved